Here is a design idea for
molded bath salts that can be fun,
especially if you like a bit of a
challenge! Now, please don't ask
me why I tackled this idea, but I can
tell you that I was after some shell
designs for fizzing molded bath salts
(aka bath bombs), and the majority of
shells are very fragile ... dainty
designs do not seem to hold up in
a molded bath salt. From my experience,
molded salts need a sturdy and solid
mold, otherwise little appendages can
break off very easily, either during
mold release or during any handling
after packaging.
Although this particular method is
a bit more difficult to make than using
candy molds or other simple molds,
the end result is a nice handmade
bath salt with an imprinted design ...
in this case, a sea star, (otherwise
known as a starfish). It can be a
bit tricky at first, but once you
get the hang of it, you can create
unique molded fizzies with a variety
of designs, such as flowers, leaves,
butterflies, shells and other shapes.
The following is the recipe I have
the most experience with. This is
for a single batch of the mixture,
which can be doubled if preferred.
But, for beginners, a single batch
is best, as once the mixture gets
moistened and is ready for the molds,
you need to work fast ...
so it's best to start off making
small batches and then after some
practice, a double or triple batch
may be easier for you to work with.
Here's the recipe ...
2 T. citric acid (fine or extra fine)
2 T. corn starch
4 T. baking soda
1 T. light carrier oil
1/2 t. scented oil
Witch hazel in a spray bottle
 |
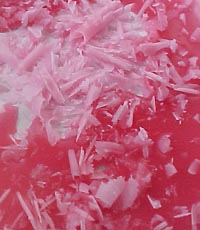
| Bath Salt Mix - Dry |
There are several carrier oils you
can use ... for instance: sunflower,
almond, apricot or peach kernel,
rice bran, and grapeseed all work well.
Some carrier oils can be too heavy
for bath salts and will be too oily,
such as castor. This is important
to note, not only for the skin, but
also for the shower or bath tub!
Your scented oil can be either
fragrance oil or essential oil,
but if using essential oil, you
only need a few drops or so.
(You will find additional oils
mentioned at the bottom of this post.)
After your dry ingredients have
been measured and mixed together,
add your oil and scent and mix well ...
this mixture can sit for as long as
you need it to until you are ready
to wet your mixture to press into molds.
Then, when you are ready to mold your
mixture, (and not a moment sooner!),
spritz the mixture with witch hazel.
Rubbing alcohol (isopropyl)can also
be used, although it has a slight
odor and is not a natural ingredient.
Unless you have purchased a true
witch hazel hydrosol, most witch
hazel has some isopropyl in it.
 |
Bath Salt Mix - Wet
|
The number of times you will need
to mist will vary depending upon your
spray bottle. My misting bottle that
I use for these requires that I depress
(spray) about seven times for a single
batch ... as soon as they've been
spritzed, mix well with a fork and
hurry to get your mixture pressed
into molds. A dough scraper works
quite well to level out the backs
of your molds once they've been
filled. Tip ... if you scrape in
the direction of nearby empty molds
on the tray, some of the excess
mixture will fill the empty molds
and you will have less waste.
You want the mixture to be wet
enough to stick together in the
mold, but not overly wet ...
it should be similar to a "dough"
texture, NOT a "batter!"
If you wish to add some color,
soap-safe colorants can be used,
or, you can mix some powdered
botanicals for natural colorants
into your carrier oil before mixing.
Cosmetic grade oxide powders can
also be mixed with your oil to
dissolve ahead of time ... if you
add them directly, you can make
speckles, if you should desire
such a look. Food coloring is
not preferred, although they
can work in small amounts if
you want to practice making
these prior to ordering your
real supplies.
The following design came about from
a combination of two mixtures being
pressed into one mold ... it kind
of gives a crumbly effect. For instance,
a "tart" such as this could be scented
with a berry scent and with the use
of another color, with the same
mold, another type of scent can
be used to create an entirely
different result.
 |
| Molded with two mixtures at the same time |
To make an imprinted design, such as
this sea star, you will need a shape
to insert into the bottom of the mold.
This is a plastic piece, which has
been coated with some carrier oil
and placed in the bottom of a
mini muffin tin. (It is my opinion
that this step keeps the plastic
shape from sticking to the bath
salt mix.) Simply press your salts
mixture into the mold, making sure
you have pressed firmly up against
the embossing piece. After your
salt mixture has hardened enough
for easy removal from the tray
(tips will follow), use a thin
metal pick (a poultry lacer does
the trick for me) to gently pry
the edges of the plastic design
piece (sea star in this case)
from the bath salt, and allow
it to sit, untouched to harden.
 |
| Ready for mixture to be pressed into tray |
Whether using the imprinted design
or a candy mold design, allow the
mold tray to sit untouched after
filling the molds until the mixture
has dried ... depending on the humidity,
this can be anywhere from fifteen
minutes to a half hour. To release
from your mold, you will do these
in similar fashion to a pineapple
upside down cake ... secure and
flip over. For instance, if using
a candy mold, place a piece of wax
paper over the filled tray and then
a rigid piece of cardboard or a
flat tray over that and turn it
all upside down (making sure to
securely hold the wax paper and
rigid backing or tray in place)
so the mold will release its
contents onto the wax paper
and tray. By using a rigid
backing of some sort, or a tray,
you can then move your molded
salts to a dry place where they
can cure (harden) before placing
them in an airtight wrapping or
container; this can take about
a day or so. (If humidity is high,
they can be placed in an oven
that is not turned on.)
 |
| Ready for shaped insert to be removed |
When removing the shape, it seems
to make things easier if you first
gently pry the outside edges of it
up first, all the way around, then
go around again once it has been
loosened and it will then come up
easily. Be careful not to disturb
the bath salt when lifting the piece
away from it ... the use of tweezers
may help.
A word of caution ... never let
bath salts sit in the molds for
too long ... they can stick to
plastic candy molds, or in the case
of using a plastic imprinted design,
it can make it almost impossible
to remove the plastic design piece.
These can be used in the bath, as
well as in a shower ... simply use a
large plastic tumbler with a small
bath salt, or a portion of a larger
one, fill with water, and use
for an emollient rinse.
~~~~~~~~~~~~~~~
Some other light carrier oils:
Camellia
Hazelnut
Hemp Seed
Jojoba
Some that are heavier and most likely
should not be used in bath salts:
Avocado
Babassu
Macadamia Nut
Olive
Note that we have purposely left
off some available oils as we have
read that they can go rancid rather
quickly. Since some people keep
bath salts around for awhile,
it may be best to select oils
that have a longer shelf life.
However, grapeseed is listed,
as it's considered a nice,
lightweight oil, although it
may not have a prolonged
shelf life. Carrier oils
that have gone rancid take
on a funny smell, so it's
best to keep your oils in
a cool, dark place ... this
includes your refrigerator.
Other items, such as hydrosols,
are also best kept there ...
just make sure you have
properly labeled your bottles
so everyone else who uses
the refrigerator is aware.
Although natural ingredients
are not toxic, one would surely
be surprised to take a sip of
witch hazel if they thought
it was water!
~~~~~~~~~~~~~~~~
Happy Molding!!
Kathy
 |
| Finished |